
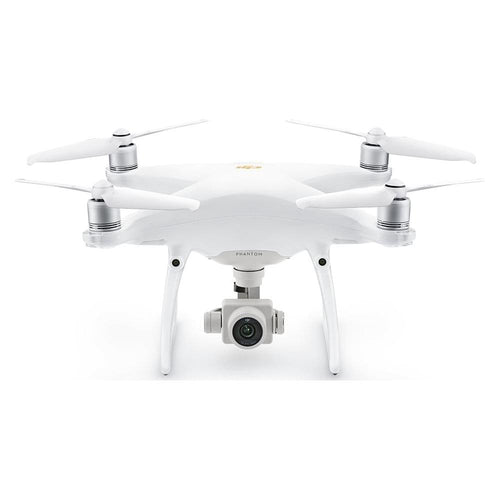
 The DJI Inspire 2 has, from the moment it was unveiled, been aimed squarely at professional cinematographers and aerial photographers. With a launch event in the Warner Bros lot and its audience demo consisting of live scene shoot, they weren’t exactly being subtle about their target market.
Series Guide
Part 1 - Inspire 2 Batteries In Depth Part 2 - Inspire 2 Remote Controller In Depth Part 3 - Inspire 2 Cameras & Licenses In Depth Part 4 - Inspire 2 The Aircraft In DepthThe good news for those considering the Inspire 2 is that DJI can back up their entrance into a challenging market with an exceptional pair of new Zenmuse cameras. The X4S and X5S are both huge steps up in quality from what people have come to expect from drone footage. Suitable for everything from feature films to live, on-site broadcasting and even industrial use cases; the Inspire 2 has totally reinvented the aerial camera.
The Zenmuse X5S and X4S
Before we delve into the capabilities of the X4S and X5S and how they stack up against each other, here are the full specifications for both models.
 Zenmuse X4S Zenmuse X4S
|
 Zenmuse X5S Zenmuse X5S
|
Dimensions |
125×100×80 mm | 140×98×132 mm |
Weight |
253 g | 461 g |
Supported Lens |
Only Stock Lens Supported F/2.8-11, 8.8mm (35 mm Equivalent: 24mm) | DJI MFT 15mm/1.7 ASPH (With Balancing Ring and Lens Hood) Panasonic Lumix 15mm/1.7 (With Balancing Ring and Lens Hood) Panasonic Lumix 14-42mm/3.5-5.6 HD Olympus M.Zuiko 12mm/2.0 (With Balancing Ring) Olympus M.Zuiko 17mm/1.8 (With Balancing Ring) Olympus M.Zuiko 25mm/1.8 Olympus M.Zuiko 45mm/1.8 Olympus M.Zuiko 9-18mm/4.0-5.6 |
Sensor |
CMOS, 1″ Effective Pixels: 20 MP | CMOS, 4/3” Effective Pixels: 20.8MP |
F O V |
84 ° | 72° (with DJI MFT 15mm/1.7 ASPH ) |
Photo Resolutions |
3:2, 5472×3648 4:3, 4864×3648 16:9, 5472×3078 | 4:3, 5280×3956 16:9, 5280×2970 |
Video Resolutions |
H.264 C4K:4096×2160 23.976/24/25/29.97/47.95/50/59.94p @100Mbps 4K: 3840×2160 23.976/24/25/29.97/47.95/50/59.94p @100Mbps 2.7K: 2720×1530 23.976/24/25/29.97p @80Mbps 47.95/50/59.94p @100Mbps FHD: 1920×1080 23.976/24/25/29.97p @60Mbps 47.95/50/59.94p @80Mbps HD: 1280×720 23.976/24/25/29.97p @30Mbps 47.95/50/59.94p @45MbpsH.265 C4K: 4096×2160 23.976/24/25/29.97p @100Mbps 4K: 3840×2160 23.976/24/25/29.97p @100Mbps 2.7K: 2720×1530 23.976/24/25/29.97p @65Mbps 47.95/50/59.94p @80Mbps FHD: 1920×1080 23.976/24/25/29.97p @50Mbps 47.95/50/59.94p @65Mbps HD: 1280×720 23.976/24/25/29.97p @25Mbps 47.95/50/59.94p @35Mbps | CinemaDNG 5.2K: 5280×2970 23.976/24/25/29.97p,12-bit,up to 4.2Gbps 5.2K: 5280×2160 23.976/24/25/29.97p,12-bit 4K: 4096×2160,3840×2160 23.976/24/25/29.97/47.95p,12-bit,up to 3.6Gbps 4K: 4096×2160,3840×2160 50/59.94p,10-bitProRes 5.2K: 5280×2160 23.976/24/25/29.97p,10-bit,422HQ@1.8Gbps 4K: 3840×2160 23.976/24/25/29.97p,10-bit,422HQ@1.3Gbps 4K: 3840×2160 23.976/24/25/29.97p,10-bit,444HQ@2.1GbpsH.264 C4K:4096×2160 23.976/24/25/29.97/47.95/50/59.94p @100Mbps 4K: 3840×2160 23.976/24/25/29.97/47.95/50/59.94p @100Mbps 2.7K: 2720×1530 23.976/24/25/29.97p @80Mbps 47.95/50/59.94p @100Mbps FHD: 1920×1080 23.976/24/25/29.97p @60Mbps 47.95/50/59.94p @80Mbps 119.88p @100MbpsH.265 C4K: 4096×2160 23.976/24/25/29.97p @100Mbps 4K: 3840×2160 23.976/24/25/29.97p @100Mbps 2.7K: 2720×1530 23.976/24/25/29.97p @65Mbps 47.95/50/59.94p @80Mbps FHD: 1920×1080 23.976/24/25/29.97p @50Mbps 47.95/50/59.94p @65Mbps 119.88p @100Mbps |
Photo Formats |
DNG, JPEG, DNG+JPEG | DNG, JPEG, DNG+JEPG |
Video Formats |
MOV, MP4 | RAW,ProRes,MOV,MP4 |
Operation Modes |
Capture, Record, Playback | Capture, Record, Playback |
Still Photography Modes |
Single shot, Burst shooting: 3/5/7/10/14 frames, Auto Exposure Bracketing, 3/5 bracketed frames at 0.7EV bias, Interval | Micro SD: Single shot, Burst Shooting: 3/5/7/10/14 frames, Auto Exposure Bracketing, 3/5 bracketed frames at 0.7EV bias, Timelapse SSD: RAW Burst Shooting: 3/5/7/10/14/20/∞ frames |
Exposure Mode |
Auto, Manual, Shutter Priority, Aperture Priority | Auto, Manual, Shutter Priority, Aperture Priority |
Exposure Compensation |
±3.0 (1/3 increments) | ±3.0 (1/3 increments) |
Metering Mode |
Center-weighted metering, Spot metering (area option 12×8) | Center-weighted metering, Spot metering (area option 12×8) |
AE Lock |
Supported | Supported |
Electronic Shutter Speed |
Mechanical Shutter: 8 – 1/2000s Electronic Shutter: 1/2000 – 1/8000s | 8-1/8000s |
White Balance |
Auto, Sunny, Cloudy, Incandescent, Neon, Custom (2000K – 10000K) | Auto, Sunny, Cloudy, Incandescent, Neon Custom (2000K–10000K) |
ISO Range |
100 – 6400 (Video) 100 – 12800 (Stills) | 100 – 6400 (Video) 100 – 25600 (Stills) |
Video Captions |
Supported | Supported |
Anti-Flicker |
Auto, 50Hz, 60Hz | Auto, 50Hz, 60Hz |
PAL/NTSC |
Supported | Supported |
Angular Vibration Range |
±0.01° | ±0.01° |
Mount |
Detachable | Detachable |
Controllable Range |
Tilt: +30°to -90°, Pan: ±320° | Tilt: +30°to -90°, Pan: ±320° |
Mechanical Range |
Tilt: +50°to -140°, Pan: ±330°, Roll: +90° to +50° | Tilt: +50°to -140°, Pan: ±330°, Roll: +90° to +30° |
Max Controllable Speed |
Tilt: 90°/s, Pan: 90°/s | Tilt: 90°/s, Pan: 90°/s |
Operating Temperature |
14°–104°F (-10 to 40℃) | 14°–104°F (-10 to 40℃) |
Storage Temperature |
-4°–140°F (-20 to 60℃) | -4°–140°F (-20 to 60℃) |
LEARN MORE ABOUT ALL AVAILABLE INSPIRE 2 ACCESSORIES
The Zenmuse X4S
The more affordable companion to DJI’s Inspire 2, the Zenmuse X4S will give you slightly better video and image quality as the Phantom 4 Professional. This isn't something to sniff at, however, as the P4 Pro has revolutionised consumer quadcopters with a camera able to capture amazing aerial imagery. For those without the need for out and out cinema-quality, this is definitely the option to consider. The X4S is undoubtedly a powerful camera, with a 20MP, 1-inch sensor and ISO of up to 12,800. DJI have improved the dynamic range of the X4S by 1 stop when compared to the X3 and have designed a low distortion lens to bring your aerial shots to the next level. When coupled with the sensor, this 24mm prime lens offers an 84° FOV in high resolution and 11.6 stops of dynamic range. Fitted with a compact, purpose-built 8.8mm/F2.8-11 lens, the X4S is an impressively powerful camera for its compact size. Solid MTF rating and an absence of low-pass filters make it a great aerial imagery tool, as well as an asset for handheld ground shots. Operating a ‘leaf shutter’ with speeds of up to 1/2000, the X4S eradicates rolling shutter issues and the distortion that occur due to tracking fast-moving subjects. This is a perfect match for the increased speed of the Inspire 2 and ensures rapid, smooth shots are a breeze to film. Utilising the Inspire 2’s CineCore 2.0 system, the Zenmuse X4S can record 4K at 60fps using H.264 and 4K at 30fps using H.265 at 100Mbps bitrate. This also enables you to capture JPEG and DNG photos at up to 14fps in Burst Mode and take stills while recording, so you don’t miss out on capturing the ideal shot. A highly reactive, lightweight integrated gimbal; the X4S has a precision level of ±0.01° and keeps footage smooth with an innovative damping system. Due to its mechanical design and wiring, it is only capable of 320° rotation, but the eerily steady Inspire 2 can make yaw around for the extra 40° if necessary.
ORDER THE ZENMUSE X4S FROM HELIGUY
The Zenmuse X5S
Then we come to the pinnacle of aerial imaging quality from DJI, the X5S. This new Zenmuse camera has an upgraded onboard Micro 4/3 sensor which sets it apart from DJI’s previous models. Boasting 20.8MP quality with a pixel size of 3.4μm and 12.8 stops of dynamic range, this is the undisputed king of the Zenmuse range. Although it has been upgraded, the X5S still uses a standard Micro 4/3 mount allowing support for a range of lenses with a range of focal lengths from 9-45mm. See below for specific models.
- Olympus M.Zuiko 12mm/2.0
- Olympus M.Zuiko 17mm/1.8
- Olympus M.Zuiko 25mm/1.8
- Olympus M.Zuiko 45mm/1.8
- Olympus M.Zuiko 9-18mm/4.0-5.6
- DJI MFT 15mm/1.7 ASPH
- Panasonic Lumix 15mm/1.7
- Panasonic Lumix 14-42mm/3.5-5.6 HD
ORDER THE ZENMUSE X5S FROM HELIGUY
Key Comparisons: X5S and X4S
Here are a couple of comparative points to take into consideration when choosing the right Zenmuse for you.- The Zenmuse X5S offers much sharper still images than the X4S, this is evident when zooming into shots as more quality is maintained in the stills taken by the X5S
- The X5S’s bigger lens means that there’s likely to be more instances of flaring, however, both cameras are more than capable of taking amazing stills in harsh lighting conditions
- Both models are capable of a high level of highlight and shadow recovery due to the amount of data taken in by the sensors
- The X5S performs better than the X4S in challenging low light environments, for instance when capturing a dark environment with isolated instances of harsh lighting
Intelligent Sensing Solutions
Thanks to advances driven by the release of the original Phantom 4, obstacle avoidance is now an essential part of DJI’s products. The Inspire 2 is no exception, with an array of sensors ensuring that your aircraft remains safe, even in more challenging filming environments. The Inspire 2 has forward and downward vision systems which enable the detection of objects at a range of 30m which DJI claim will offer full protection at speeds of up to 34mph. There’s also an upwards facing infrared sensor which can detect obstacles within 5m of the aircraft which is handy if you’re looking to fly in an enclosed space. These avoidance sensors operate during normal flights, Return to Home and every Intelligent Flight Mode built-in to the aircraft. They aren’t active in Sports Mode, however, so make sure you’re racing around a wide-open space. See the diagram below for a visual representation of the Inspire 2’s sensor array.
Controlling the Camera
It couldn’t be easier to operate the Inspire 2’s camera, whether you’re using the X4S or X5S, DJI have gone to town on ease of use for this quadcopter. Yes, it’s a high-end professional rig but it’s been designed to let you focus on getting your shot, the controls are intuitive and, if you’re more interested in footage than flying, the Inspire 2 does a great job of taking care of the latter for you. As with the Inspire 1 range, you’re also able to fly with dual operators. One piloting the aircraft while one takes care of the camerawork. While this was, without question, the most effective way to ensure footage quality on the older models, the Inspire 2 also features an option to capture spectacular imagery and footage without the need for a second operator in the form of its new FPV nose camera. This makes simultaneous control of both the aircraft and camera a simple task For a full explanation of how you can control the camera via the Inspire 2’s Remote Controller, you can find out more in the previous entry in the series.CINESSD and Licenses
With a new level of quality comes a new level of storage capacity in the form of the Inspire 2 CINESSD range. While you can still record onto a Micro SD card, to truly realise the potential of the Inspire 2’s footage quality, you will need to get yourself a DJI CINESSD. We would recommend going for at least the 240GB version of the DJI CINESSD (if not, the 480GB) if you really want to get the most out of what your X5S camera can offer. The 120GB version limits not only saving capacity but also the quality you’re able to shoot. There have been some changes made since the Zenmuse X5 which mean that the CINESSD CineCore 2.0 system is integrated into the aircraft and the SSDs no longer need to be inserted into the gimbal unit. To use your CINESSD with the Inspire 2 aircraft, simply find the slot located at the very rear between the battery housings and insert your card. To export files, you will need the DJI CINESSD Station which acts as an intermediary between the cards and your computer. Look at the below tables to explore the differences between the Inspire 2 SSDs.

 As you can see in the above graphics, there are also currently three separate licenses available which allow you access to either CinemaDNG, Apple ProRes or both in a bundle. The table below highlights the key features of each and will help you make a decision based on which workflow best suits your needs.
CinemaDNG License Key
Features |
- CinemaDNG support - Accurately records all details of a scene - Oversampling captures more detail - Popular workflow support |
Specifications |
- 3840x2160 12bit 23.976*/24*/25*/29.97*/47.952 fps - 3840x2160 10bit 50/59.94 fps - 4096x2160 12bit 23.976*/24*/25*/29.97*/47.952 fps - 4096x2160 10bit 50/59.94 fps - 5280x2972 12bit 23.976/24/25/29.97 fps |
Apple ProRes License Key
Features |
- Apple ProRes 422 HQ and Apple ProRes 4444 XQ (no alpha) support - Oversampling captures more detail - Popular workflow support |
Specifications |
Apple ProRes 422 HQ: - 3840x2160 23.976*/24*/25*/29.97* fps - 5280x2160 23.976/24/25/29.97 fpsApple ProRes 4444 XQ(no alpha): - 3840x2160 23.976*/24*/25*/29.97* fps |
CinemaDNG & Apple ProRes License Key
Features |
- CinemaDNG and Apple ProRes support - Oversampling captures more detail - Popular workflow support |
Specifications |
CinemaDNG: - 3840x2160 12bit 23.976*/24*/25*/29.97*/47.952 fps - 3840x2160 10bit 50/59.94 fps - 4096x2160 12bit 23.976*/24*/25*/29.97*/47.952 fps - 4096x2160 10bit 50/59.94 fps - 5280x2972 12bit 23.976/24/25/29.97 fpsApple ProRes 422 HQ : - 3840x2160 23.976*/24*/25*/29.97* fps - 5280x2160 23.976/24/25/29.97 fpsApple ProRes 4444 XQ(no alpha): - 3840x2160 23.976*/24*/25*/29.97* fps |
Purchasing Your License
Here are the steps you will need to follow to successfully purchase and register your license with DJI. Before you begin, ensure that you have the DJI software downloaded to your computer and the latest version of the DJI GO 4 app on your mobile device.- Log into your account on the DJI Store
- Select the license you wish to purchase
- Enter the serial number of your Inspire 2 (this can be found on the side of the aircraft beneath a QR code)
- Once this is accepted you will be prompted to enter your payment details
- After confirmation of payment, you will receive a verification email with a confirmation code
- Open the DJI software on your desktop
- Select the ‘Licenses’ tab and verify your purchase with the code found in the email
- If every step has been completed you should now be free to operate under your new license
Find Out More
We will be putting the Inspire 2 through its paces at a location close to Heliguy's Newcastle HQ and will also investigate how well it functions alongside the recently released Ground Station Pro app. Stay tuned for exclusive images, video footage and insider opinions from our technical team. If you want to ask us anything else about this fantastic professional quadcopter, don't hesitate to get in touch.Call
...
Keep checking back to Heliguy's Insider blog for more in-depth overviews, DJI product information and, of course, the latest news from the drone industry.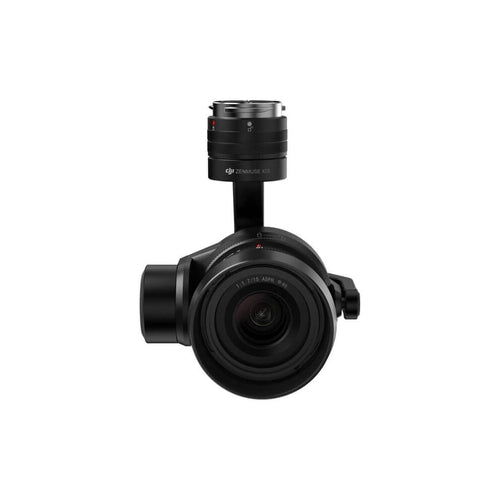

Leave a comment