
In this post, we will be looking into how to attach a Crystal Sky Monitor to your DJI Spark or DJI Mavic. For this to work you will need the following:
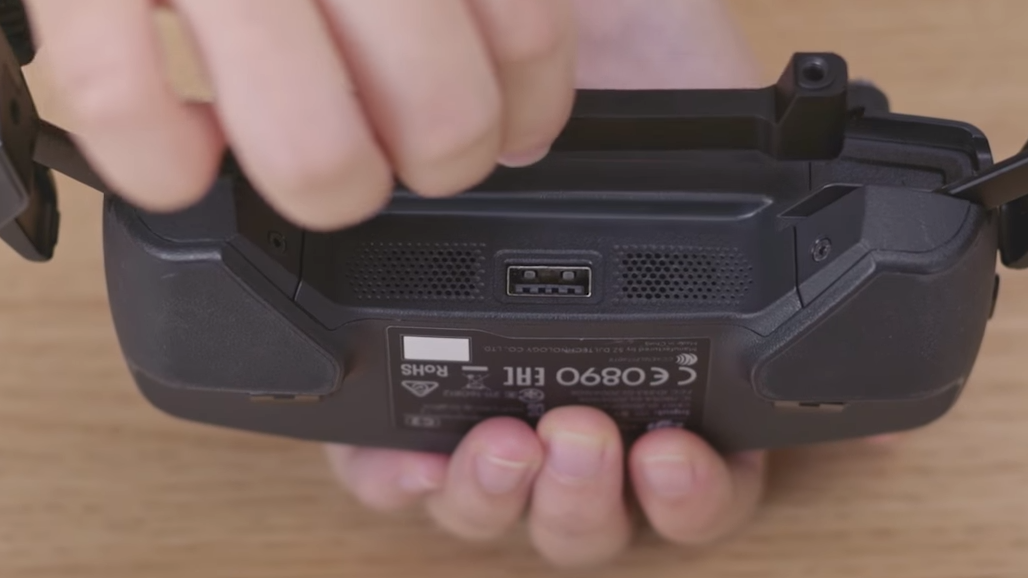
 2. Take USB cable out of controller if there is already one in.
  3. Take part "C" and place inside the controller's handles. Close the handles so they cover part "C".
 5. Place the bottom bracket on your Crystal Sky and screw in place.
  6. Attach the battery to Crystal Sky.
  7. Slot the monitor into the remote and clamp the buckle down to hold the Crystal Sky in place.
  8. Turn on your remote, the Crystal Sky should boot up with the controller.
  9. Once the Crystal Sky has booted up completely press the menu button in the middle of the of the side buttons.
  10. Click "Flip Screen" to rotate the screen the correct way.
  Now your crystal sky is all set up for use with your DJI Spark or Mavic
- Mounting Bracket Adapter
- Spark or Mavic Remote
- Unpack all pieces of the pack.
2. Take USB cable out of controller if there is already one in. 3. Take part "C" and place inside the controller's handles. Close the handles so they cover part "C".

5. Place the bottom bracket on your Crystal Sky and screw in place. 6. Attach the battery to Crystal Sky. 7. Slot the monitor into the remote and clamp the buckle down to hold the Crystal Sky in place. 8. Turn on your remote, the Crystal Sky should boot up with the controller. 9. Once the Crystal Sky has booted up completely press the menu button in the middle of the of the side buttons. 10. Click "Flip Screen" to rotate the screen the correct way. Now your crystal sky is all set up for use with your DJI Spark or Mavic
Subscribe to our YouTube Channel for Exclusive DJI News, Reviews and Advice

Leave a comment