
In this post, we look at how to use the Hyperlapse mode on the DJI Mavic 2 and look into how the different modes work. For the Hyperlapse feature to work, take off the and position it the where you want your Hyperlapse to start.
 2. Select "Timelapse".
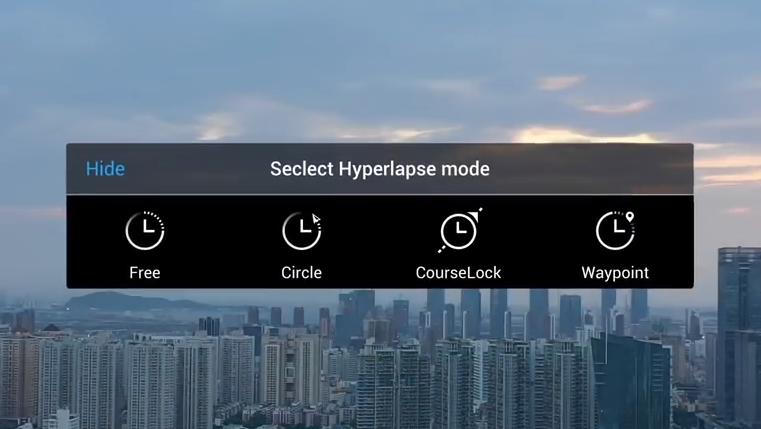
 3. Select the type of Timelapse you would like to complete. Then select the interval and select "Go" this will start your Hyperlapse.


- Click the remote controller on the left-hand side of the screen.
2. Select "Timelapse".
3. Select the type of Timelapse you would like to complete. Then select the interval and select "Go" this will start your Hyperlapse.
Hyperlapse Breakdown
Free
This is where you will have control of only the attitude of the drone and the tilt of the camera.
Circle
Circle automatically moves around a selected object producing a Hyperlapse at the same time.
Course Lock
Course Lock allows you to lock onto an object and move along a pre-set line automatically panning the camera to fix on the selected target.
Waypoint
This mode allows you to set points and have the drone automatically move between them making a hyperlapse. You can add up to 5 points to create your hyperlapse.
Subscribe to our YouTube Channel for Exclusive DJI News, Reviews and Advice

Leave a comment