
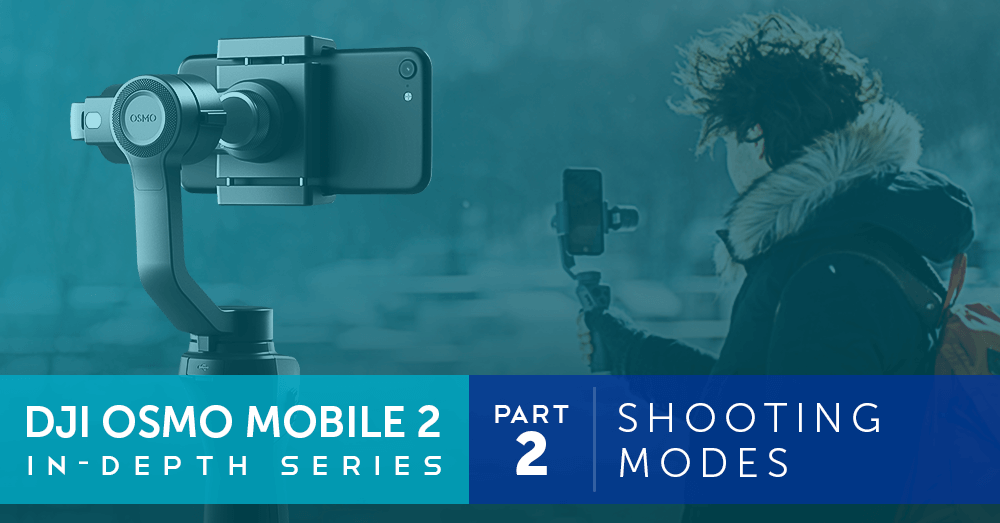
 Continuing our in-depth series at the DJI Osmo Mobile 2, we have been looking at the incredible range of shooting modes that DJI have packed into this impressive smartphone gimbal.
This latest iteration of the Osmo Mobile builds on the features of the original Osmo Mobile, improving the performance and overall functionality of the gimbal. It also includes the new Hyperlapse mode which helps you create a unique shot that was previously time-consuming both its production and editing.
Keep reading to see the video and picture options on the Osmo Mobile 2 and see some examples of what you can create.
Continuing our in-depth series at the DJI Osmo Mobile 2, we have been looking at the incredible range of shooting modes that DJI have packed into this impressive smartphone gimbal.
This latest iteration of the Osmo Mobile builds on the features of the original Osmo Mobile, improving the performance and overall functionality of the gimbal. It also includes the new Hyperlapse mode which helps you create a unique shot that was previously time-consuming both its production and editing.
Keep reading to see the video and picture options on the Osmo Mobile 2 and see some examples of what you can create.
Please Note - All images and videos were taken on an iPhone 7 Plus and the DJI Osmo Mobile 2.
Osmo Mobile 2 Video
Check out our video overview of the features on the DJI Osmo Mobile 2:DJI Osmo Mobile 2 Follow and Free Modes
Before we delve into the various photo and video modes, we wanted to cover the two standard modes available for the Osmo Mobile 2; Follow and Free Mode. These are the two standard operating modes for the Osmo. You can switch between the two modes by pressing the power/mode button when the gimbal is powered on. Follow Mode: In this mode, the Osmo Mobile 2 will follow the movement of your arm to reduce shake in your footage. This mode is best when following a subject that’s moving. When you power on the Osmo it will be in the Follow Mode. The Osmo will act as below: Free Mode: In this mode, the Osmo will lock the camera on a point ignoring your movement. This mode is best suited to a stationary subject that you want to keep your camera trained on. The Osmo will act as below:DJI Osmo Mobile 2 Photos
The DJI Osmo Mobile 2 features several picture modes to capture different kinds of shots when using the DJI GO app. These is the Single Shot, Burst Shot and a variety of Panorama and Long Exposure options.Osmo Mobile 2 Single Shot
The Single Shot is the standard mode for capturing images on the DJI Osmo Mobile 2. This mode lets you utilise the front and rear facing cameras for portrait and landscape shots. To use this mode, enter the camera screen and simply press the shutter button on the Osmo handle or on the screen of the DJI GO app. Example Shot with the Osmo Mobile 2
There are also options available in the settings for the standard photo mode. These are shown below:
Example Shot with the Osmo Mobile 2
There are also options available in the settings for the standard photo mode. These are shown below:
 Single Shot Settings
You can choose to take a picture with a delay of two, five or ten seconds. This is great for capturing a group shot when using a tripod and allowing you to prepare for a photo.
You're also able to take a HDR (High Dynamic Range) shot in which multiple images with varying exposures are captured and automatically combined to produce the highest quality image. This is a popular feature and can help you achieve the best photo results. We use this setting as standard in our images to get the best results.
You can also capture a burst of images by holding down the shutter button on the Osmo handle or your screen. This will result in a series of photos being taken for the duration you hold the button down.
Single Shot Settings
You can choose to take a picture with a delay of two, five or ten seconds. This is great for capturing a group shot when using a tripod and allowing you to prepare for a photo.
You're also able to take a HDR (High Dynamic Range) shot in which multiple images with varying exposures are captured and automatically combined to produce the highest quality image. This is a popular feature and can help you achieve the best photo results. We use this setting as standard in our images to get the best results.
You can also capture a burst of images by holding down the shutter button on the Osmo handle or your screen. This will result in a series of photos being taken for the duration you hold the button down.
Panorama on the Osmo Mobile 2
The Osmo Mobile 2 can also capture several different types of panoramas with the touch of a button. The Osmo will automatically rotate and capture a series of images that it will then process and automatically merge. This cuts out the manual photos and editing required in traditional panoramas. To capture a panorama, go to the settings in the camera option and choose between the standard Panorama, 180° Panorama or the Ultra WideAngle/360° as shown below: Panorama Settings
For our examples, we mounted the Osmo Mobile 2 on a tripod on a small bridge to show the difference between each type of panorama. The shot under the Single Shot heading above is an example of the standard shot.
Panorama Settings
For our examples, we mounted the Osmo Mobile 2 on a tripod on a small bridge to show the difference between each type of panorama. The shot under the Single Shot heading above is an example of the standard shot.
Panorama
The Panorama mode will take several photos creating a wider angle shot than the original image. This allows you to capture a shot similar to the standard image with a little more detail. It's great if you want a wider field of view. DJI Osmo Mobile 2 Panorama
180° Panorama
The 180° Panorama will rotate the Osmo 180° in order to capture a wider scene. As you can see from the bridge walls, the Osmo rotates a broad range to capture a huge amount of detail from your scene. DJI Osmo Mobile 2 180° Panorama
Ultra WideAngle/360°
The final panorama is referred to as the Ultra WideAngle or 360°. In this mode, the Osmo will rotate as far as it can to a full 360° scene. This creates a unique image packed with detail. DJI Osmo Mobile 2 360° Panorama
Osmo Mobile 2 Long Exposure
Long exposure images are traditionally created by increasing the shutter speed on your camera in order to slowly capture an image using the camera's sensor. This can be quite time-consuming as you need to ensure the exposure is right by controlling the aperture and ISO and test out your settings to check the results. With the Osmo Mobile 2, you can achieve the same results, however, the Osmo does the hard work for you. It will take continuous pictures and won't stop until you tell it to. The pictures are overlapped giving you the effect of a long exposure shot. There are two types of long exposure available; standard Long Exposure and Lighttrail (usually light trail). Below are the settings for these options: Long Exposure Settings
Long Exposure
This mode is great for creating a smooth and surreal kind of image, especially with a something that moves like water. Osmo Mobile 2 Long Exposure
Lighttrail
The Lighttrail option is similar to the above but picks up more detail from any moving light. In the below image, you can see the trails of light in the air from bugs flying in front of the Osmo: DJI Osmo Mobile 2 Long Exposure - Lighttrail
Check out our previous post on the DJI Osmo Mobile 2 settings here.
DJI Osmo Mobile 2 Videos
The DJI Osmo Mobile 2 features a wide range of shooting modes that let you capture advanced shots with ease. Shots can be used to drop into your project or to quickly share on social media. Below is the menu of the video modes on the Osmo Mobile 2: Osmo Mobile 2 Video Settings
Normal Video Mode
The standard shooting mode on the Osmo utilises the camera on your smartphone to shoot video in up to 4K at 30fps. You can use the front and rear cameras for video in either the portrait or landscape setup. If shooting in 1080p or 4K, you will have to select these settings in the camera settings as pictured below: Osmo Mobile 2 Video Settings
Check out the normal video mode in action:
Osmo Mobile 2 Video Settings
Check out the normal video mode in action:
Zoom Control
Using the slider on the handle of the Osmo Mobile 2 allows you to zoom the camera in/out. This utilises the digital zoom on your smartphone to get closer to your scene as shown in the example below:Timelapse
The Timelapse on the Osmo Mobile 2 allows you to create a stunning shot showing movement over a set period of time. This allows you to show people, clouds, water etc. moving. You can set the Osmo to record in intervals of between 0.5 and 60 seconds for a duration of one minute to five hours.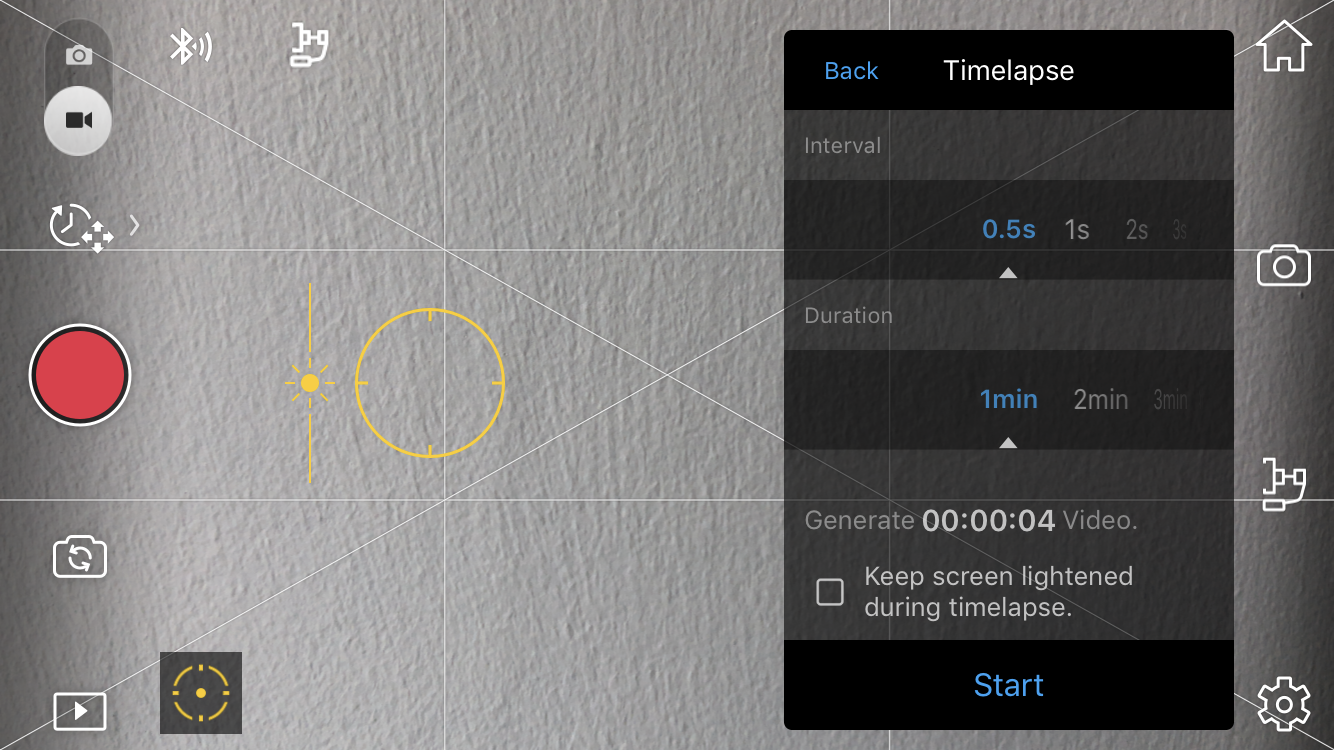 Osmo Mobile 2 Timelapse Settings
Once you input the duration and intervals, the Osmo will advise the length of the footage. An example of this is if you record every two seconds for six minutes, you will get six seconds of footage.
Check out an example of the Osmo's Timelapse of a waterfall below:
We used a tripod for this example to give a stable timelapse without any movement.
Osmo Mobile 2 Timelapse Settings
Once you input the duration and intervals, the Osmo will advise the length of the footage. An example of this is if you record every two seconds for six minutes, you will get six seconds of footage.
Check out an example of the Osmo's Timelapse of a waterfall below:
We used a tripod for this example to give a stable timelapse without any movement.
Motionlapse
The Motionlapse is similar to the Timelapse, however, you can set up to five points for the Osmo to automatically move between. Choose from 0.5 to 60 seconds from one minute to three hours for your Motionlapse. Osmo Mobile 2 Motionlapse Settings
The Motionlapse can be used for an interesting transition shot that combines several different subjects. This can be seen in the shot below from the waterfall to the bridge as shown below:
We used a tripod again in order to give the footage a smooth and stable feel.
Osmo Mobile 2 Motionlapse Settings
The Motionlapse can be used for an interesting transition shot that combines several different subjects. This can be seen in the shot below from the waterfall to the bridge as shown below:
We used a tripod again in order to give the footage a smooth and stable feel.
Hyperlapse
The Hyperlapse setting allows you to create a timelapse whilst on the move. This is a great shot to show movement from one place to another whilst in a quick an interesting way. Like the Timelapse, you can choose between 0.5 and 60-second intervals with a duration of one minute to five hours. Osmo Mobile 2 Hyperlapse Settings
Our example shows a clip of us walking down a tree-lined path:
Osmo Mobile 2 Hyperlapse Settings
Our example shows a clip of us walking down a tree-lined path:
Slow-Motion
You can also shoot scenes in slow-motion using the DJI Osmo Mobile 2. Depending on your smartphones, either 240fps at 720p or 120fps at 1080p will be available in this mode. This allows you to slow down the action in your video as shown below:ActiveTrack
The ActiveTrack functionality can be used to capture a number of different shots for your specific shooting style. To use the ActiveTrack, select the green box at the bottom left of the DJI GO app. You can then highlight your subject for the Osmo to track using the front or rear facing camera. Osmo Mobile 2 ActiveTack Settings
One example of how you can use ActiveTrack is with a stationary subject. Simply highlight the subject then move around it whilst the Osmo stays set on your subject.
Another example of ActiveTrack in action is to have the Osmo in a set location on a tripod etc. and use it to track a moving subject. This is a great option if a presenter is doing a piece-to-camera scene as the camera will follow them if they move.
You can also use ActiveTrack when you're shooting a Hyperlapse to focus on a subject whilst on the move or during a live stream.
Osmo Mobile 2 ActiveTack Settings
One example of how you can use ActiveTrack is with a stationary subject. Simply highlight the subject then move around it whilst the Osmo stays set on your subject.
Another example of ActiveTrack in action is to have the Osmo in a set location on a tripod etc. and use it to track a moving subject. This is a great option if a presenter is doing a piece-to-camera scene as the camera will follow them if they move.
You can also use ActiveTrack when you're shooting a Hyperlapse to focus on a subject whilst on the move or during a live stream.
Live Streaming on the Osmo Mobile 2
The final setting available on the DJI Osmo Mobile 2 is the ability to live stream to a range of popular social media sites. This includes Facebook, YouTube or a custom RTMP. You can use landscape or portrait mode, however, most sites are suited to the portrait mode. To access the live stream, go to the settings and click the 'Live' option. You will then be able to choose your desired site to stream to. The options below will be available: Osmo Mobile 2 Live Steam
Depending on the option you select, you will be taken to the site to login or given instructions on how to proceed.
Osmo Mobile 2 Live Steam
Depending on the option you select, you will be taken to the site to login or given instructions on how to proceed.
Summary
The DJI Osmo Mobile 2 has a wealth of shootings modes that help you capture complex photos and videos with a simple touch of a button. These modes help to turn difficult and time-consuming shots into simple and automated ones. After getting some hands-on experience with these modes, it's clear they can help take your smartphone footage to another level whilst offering super-stabilised results. DJI have taken the positive points from the original Osmo Mobile and the rest of the Osmo Series and added new modes to develop the user experience. This gimbal is a great option for smartphone filmmakers and photographers, especially when considering it's DJI's cheapest gimbal to date.Please Note - Some settings might not be available on Android phones.
To discuss any information from the above post or any DJI or Freefly product, please give one of our team a call on 0191 296 1024 or email us at info@heliguy.com.
Keep checking back to Heliguy’s Insider Blog for more announcements, insights into drones and, of course, the latest news from the drone industry.

Leave a comment