

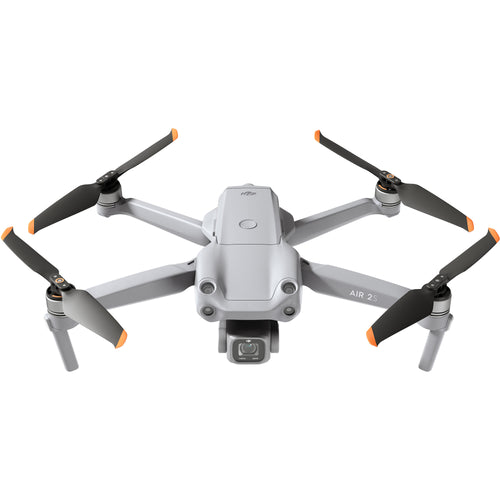
The DJI Air 2S is a compact and powerful drone, especially suited to content creators on the go, thanks to its one-inch sensor and ability to capture 20MP stills and a mightily impressive 5.4K video.
This tutorial blog will teach you how to set up the Air 2S and how to update the firmware, as well as covering the basic functions of flight and taking photographs and video.
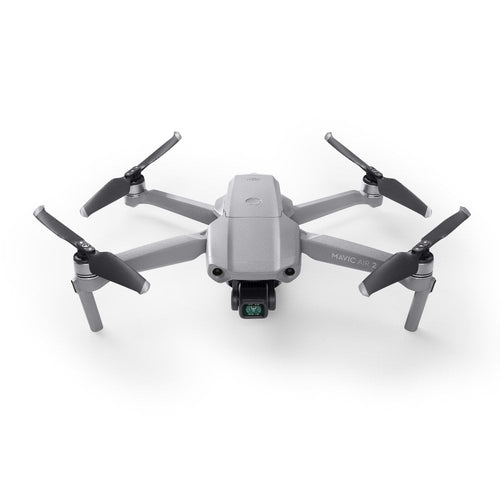
The Air 2S is an upgraded version of the Mavic Air 2 and is a worthy successor to the Mavic 2 Pro. Want to know how they compare? Then read our DJI Air 2S vs Mavic Air 2 vs Mavic 2 Pro comparison blog.
Use the following links to jump the the different parts of the DJI Air 2S beginner guide:
- Unboxing And Setting Up The Air 2s Fly More Combo
- How To Link DJI Air 2s With The DJI Fly App
- How To Activate And Upgrade The Firmware On The DJI Air 2s
- Mavic Air 2s: Preparing For Flight
- How To Fly The Air 2s Drone: Flight Basics
- DJI Air 2s: How To Take Pictures And Videos
- DJI Air 2s Return-to-home
- DJI Air 2s Safety Precautions
Unboxing And Setting Up The Air 2S Fly More Combo
- Open the outer packaging of DJI Air 2S Fly More Combo and take out the product and its accessories.
![]()
Note: Accessories are placed in two accessory kits and the remote controller already has a cable inside for smartphone attachment.
- Visit the Downloads page on the official DJI website to scan the QR code and download and install the DJI Fly app.
![]()
- Remove the gimbal protector and unfold the drone’s arms.
![]()
![]()
- DJI Air 2S has two different types of motors and propellers that must be matched.
![]()
- Attach the propellers with orange circle markings to the motors with orange markings.
Likewise attach the propellers without markings to the motors without markings. Remember to make sure the propellers are all securely attached to ensure a safe flight.![]()
- Remove the control sticks from the storage slots at the bottom of the remote controller.
![]()
- Extend the mobile device clamp and you will find a cable that can be used to attach your smartphone.
![]()
- The right side of the cable with an RC icon connects with the remote controller. The other end on the left should be used to connect your smartphone.
![]()
The cable that comes attached is a lightning cable but additional connector options can be found in the accessory kit.
- Move the connector from the left side.
![]()
- Place your smartphone inside the clamp with the charging port on the right side. Tighten the clamp making sure everything is secure and then connect the cable to your smartphone.
![]()
- When using the battery for the first time, connect to the battery charger for approximately one minute to activate the battery.
![]()
- Insert the battery into the battery compartment. You should hear a click which means the battery is secure.
![]()
- Press once and then again and hold for about two seconds to power on the remote controller and the aircraft.
![]()
- When you need to power off the aircraft and the remote controller press the power button once then press again and hold for two seconds.
![]()


How To Link DJI Air 2S With The DJI Fly App
You can use the DJI Fly app to link the aircraft with the remote controller.
- Power on the aircraft and connect your smartphone with the remote controller.
![]()
![]()
- Open the DJI Fly app, tap Connect Aircraft at the bottom right, and tap Camera View on the top right.
![]()
![]()
- Next tap Settings and then tap Connect to Aircraft at the bottom of the Control screen.
![]()
- The linking process will start when the remote controller beeps and the battery indicator blinks in sequence.
![]()
- Press and hold the power button for about four seconds.
![]()
- The battery indicator will activate, and the aircraft will begin the linking process.
![]()
- The app will display the image transmission interface screen to indicate linking was successful after the remote controller stops beeping and the battery indicators of the remote controller and aircraft stop blinking.
![]()
- You can also link the remote controller with combination buttons by simultaneously pressing the Customisable Button, the Shutter/Record Button, and the Photo/Video Toggle at the top.
![]()
- The remote controller will start to beep after two seconds and then the remote controller battery indicator will activate: Then you can begin the linking process.
![]()
- Press and hold the aircraft power button for approximately four seconds and release once it begins to beep.
![]()
- The aircraft battery indicator will activate and the aircraft will begin the linking process.
![]()
- The app will display the image transmission interface screen to indicate linking was successful after the remote controller stops beeping and the battery indicators of the remote controller and aircraft stop blinking.
![]()


How To Activate And Upgrade The Firmware On The DJI Air 2S
- All you need to do is open the DJI Fly app and follow instructions to activate the aircraft.
![]()
- A prompt will appear if a new firmware update is available.
![]()
- Tap the prompt to enter the Update screen and tap Start Update. During the update do not power off the device or exit the app.
![]()
Note: During the update it is normal for the two LED lights in the middle of the controller to blink alternatively and for the RC and the aircraft to automatically restart. After the update has finished both the aircraft and the remote controller will remain powered on.


Mavic Air 2S: Preparing For Flight
- Remove the gimbal protector, unfold the arms and securely install the propellers.
![]()
- Place DJI Air 2S on level ground making sure the aircraft is facing outward with the rear facing you.
![]()
- Open the DJI Fly app and select DJI Air 2S on the main interface.
![]()
- After linking is complete tap Go Fly. Tap Safety and set the RTH height higher than the tallest building or object near you.
![]()
Note: Avoid flying in environments with weak GPS, insufficient light, or narrow complex spaces.


How To Fly The Air 2S Drone: Flight Basics
Before flying, choose an open obstacle-free area.
- Check the battery level of the intelligent flight battery, place the aircraft on a level surface with the rear facing you, and then power on the aircraft.
![]()
- Check the battery level of the remote controller, and then power on and set the RC mode to Normal.
![]()
- Check the flight interface in the app. Confirm that there are no abnormal reminders or alerts and that the GPS signal is adequate for flight.
![]()
- Tap the takeoff icon on the left and press and hold the prompt icon to enable Auto Takeoff.
![]()
- After takeoff, the icon will change to Auto Landing. Tap the Auto Landing icon on the left and hold to make the aircraft land automatically.
![]()
- If you prefer to take off manually using Mode 2 as an example pull both control sticks all the way to the bottom of the controller and then push inwards or outwards.
![]()
- When the propellers begin to rotate gently push the left control stick up to take off.
![]()
The left control stick is used to control your flying altitude and the direction DJI Air 2S is facing.
- The right control stick is used to enable the aircraft to fly forward, backward and to either side.
![]()
- If you have powered on the motors but the aircraft has not taken off, pull down the left control stick and the motors will power off.
If DJI Air 2S is already in the air, pull down the left control stick and the aircraft will begin to land.![]()
- Press the Flight Pause/RTH button on the remote controller to make the aircraft brake.
![]()
- You can view flight distance and speed in the bottom left corner of the screen.
![]()


When the GPS signal is weak the compass experiences interference or the ambient is insufficient for visual positioning the aircraft will enter Attitude mode and cannot hover in place or auto-brake.
To avoid accidents please land in a safe location as soon as possible.
DJI Air 2S: How To Take Pictures And Videos
- Tap the Photo button on the right and choose Photo Video or QuickShots.
![]()
- The camera parameter menu at the bottom right can be used to adjust parameters.
![]()
- You can also adjust the gimbal pitch and control the camera by using the gimbal dial on the left side.
![]()
- Use the switch button on the front to switch between photo and video mode.
![]()
- Use the Shutter/Record button on the right side to quickly take photos and video.
![]()
- Digital zoom is available in Video mode.
In the DJI Fly flight interface, drag the zoom button up and down...![]()
...or tap the numbers to adjust Zoom in or out on the screen with two fingers...![]()
...or press and hold the Function (FN buton) on the RC and zoom using the gimbal dial.
- Tap the Playback icon on the bottom right to view and download your footage.
![]()
![]()


DJI Air 2S Return-to-Home
To initiate RTH, tap the RTH button on the left side of the screen...
...and hold or press the RTH button on the remote controller and hold.

NOTE: RTH can only be used once the aircraft has recorded a home point and flown at leave five metres away.
DJI Air 2S Safety Precautions
Before takeoff check if the flight environment meets all necessary requirements and set the RTH altitude.
Don’t forget to check that propellers and battery have all been installed securely and that you have removed the gimbal protector.


Thank you for the excellent instructions and pictures on getting set up! I used them when I got my DJI Air 2S and they helped A LOT! This is my first drone and I would have felt overwhelmed if it weren’t for this guide!
Great instructions. Thanks.
One note for the inboxing, might be good to note tape on each side of the gimbal needs to be removed. This must be to hold the gimbal during shipping.
This was very well done and should be #1 on the search topic list. Great job!
Guide is great. I have had drones in the past and still found the guide extremely helpful. Thank you
That’s a great getting started guide Heliguy thanks. It seems so obvious now but I wasn’t able to take videos before reading this, doh!
Leave a comment